How to Turn Your YouTube Videos into Blog Posts
Published by Drew Hendricks • Content Marketing • Posted May 23, 2016 ContentPowered.com
Usually, when we talk about repurposing content, we start with blog posts. Blog posts are big lumps of text that can be repurposed in a dozen different ways. However, in this instance, you read the title right; we’re starting with videos and transitioning them to blog posts.
There are a few reasons why you might want to go through this process. Maybe you acquired another company in a merger and they have a lot of videos but few other resources. Maybe you found old videos that still have relevant information but aren’t doing much without a video marketing strategy. Maybe you’ve been producing videos but doing nothing else with the content for a while, recently or otherwise.
Regardless of the cause, you have videos, you don’t have blog posts covering those same topics, and you want to rectify that. Here’s a general process you can follow, though it does assume you lack any of the resources that went in to making the video in the first place. If you have those resources, like a transcript or the original sources you used, then you’ll be able to skip some steps.
Step 1: Transcribe the Video
The first thing you need is a transcript of the video. Depending on the content of the video, you might just need the audio, or you might need written content like on those Moz Whiteboard Friday videos. You’ll notice that their videos have both a screenshot of the finished whiteboard and a blog transcript.

You can, if you want, simply post the transcript as a blog post. Sometimes this is fine. Often, though, it will have issues. Either it’s old enough that it’s no longer relevant on its own, or it’s too short to make good modern content. You’ll want to put some more work into it.
If you’re the owner of the channel with the ability to log in, and the video has a transcript already attached, you can download it. If neither of those are the case, you’ll be out of luck.
There are a few ways you can get transcription done for you. You can find a cheap transcriber on a site like Fiverr or a freelancer marketplace like Upwork. You can use transcription houses like Focus Forward or Daily Transcription. You can even run it through transcription software, but that’s not foolproof and will require significant proofreading.
You can also do it yourself. It’s not hard to transcribe a short video, but it will require lots of pausing and unpausing. Most professional transcribers use a foot pedal for pausing, with the unpause automatically set to rewind the video by a second or two, so they don’t have to take their hands off the keyboard and can stop when they get overwhelmed. If you have a significant amount of transcribing to do – like an entire playlist or library of a YouTube channel – you may want to invest in the tools of the trade.
Step 2: Break the Transcript Into an Outline
Videos, at least well-produced videos, tend to have a flow to them, much like a good blog post or any other good piece of content. They start with an introduction, generally of the speaker and their credentials. They go on to explain the topic of the day and the foundational knowledge you need to understand it. They ask the question they’re here to answer, then the go into explaining the question and what it means. They answer the question and provide backup information to make the answer make sense. They go over any impact that conclusion has on the world, and they close with an outro of some kind or another, possibly with a teaser at the end for other videos.
Almost all of this, save for the credentials and the teaser, is important. Even the credentials might be if you’re going to quote directly from the video.
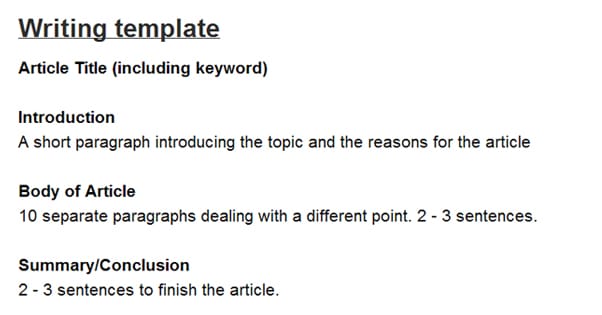
Take each section and analyze it for what it means and why it matters. Write down a sentence in your own words summarizing it. You’re essentially compressing, deconstructing, and breaking the transcript down into an outline. This will be the framework you use to write your blog post.
Step 3: Gather Informational Sources
At this point with your outline, you should know what the topic is and what primary data points need research. You will want to gather modern resources for any relevant point brought up. If someone mentions a link building strategy, look to see if it’s white or black hat. If someone brings up an important figure, check to see if they’re still important or if something has happened. If someone brings up a quote, check to see if that quote is accurate.
Gather your sources. You might not use all of them in the course of your post, but you should have a list of potential sources you can cite in your new post. As an added bonus, contacting these sources with the published content can be a link building opportunity.
Step 4: Correct Factual Errors or Changes Over Time
The world is a changing place, and no industry is an exception. New technology, new trends, new laws, new resources; they all come and go at a moment’s notice. You don’t want to make it obvious you’re rewriting an old video by referencing out of date information. It means when you publish your blog post, you’ll be mocked for being out of date and you won’t gain any followers or traffic from it.
Go through your outline and make changes necessary. Some will be updates to statistics or minor changes of people’s information. Some might be more major changes that invalidate parts of your post. These will leave you deciding something important; what do you do with the direction of your post?
When a factual error threatens the content of the post, you have three possible routes you can take. The first is to abandon the post; it’s not worth it after all. The second is to write it as-is and label it a historical perspective. Less useful, perhaps, but maybe more evergreen. The third is to change the fact and rewrite the post around it. This is most common, and most useful in an immediate sense.
Step 5: Create a New Blog Post
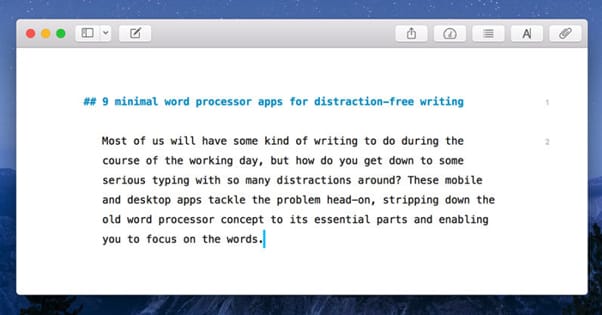
At this point you have all of the foundational work in place. You have your outline, you have your sources, and you’ve double-checked the facts. Now all you need to do is actually write the piece. Or, as the case may be, send it to a freelancer with all of the information and your requirements, and have them write it for you.
This is a point where you might want to double-check your blog strategy and make sure you have the budget for blog marketing that can cover transcription and freelance writing. You’ll want to implement some kind of ROI measurement, though it’s difficult to actually measure a return on an investment as nebulous as a blog post, particularly one as precarious as an adapted old video.
Step 6: Include Images and Links
Obviously, you’re going to want to optimize your post for “being a blog post” which, as it happens, is pretty common. Image choice and links here are both important. You have another choice to make; how much do you want to make it clear that you referenced the original video? If it’s yours to reference, there’s no problem with doing so, but if it’s a video with less provenance or a video you didn’t produce, it might be a bit of a mess to say you referenced it.
This will influence your choice whether or not to link to or embed the original video. If you’re linking to it, you can say your post was inspired by it. If you’re ignoring it, don’t link to it. In either case, link to your modern sources. Images, likewise, should be original, unless there’s actually important imagery from within the video, in which case you can take snapshots and use those as images.
If you’re having trouble taking a video snapshot – some computers only “print screen” a black screen for certain modes of hardware acceleration and processing – you can run the video through VLC media player. There’s a snapshot function in it that works very well.
Step 7: Optimize Meta Content
Don’t forget to optimize your meta content for maximum SEO appeal in the modern era. That means your meta title, which should be short and punchy to attract new readers. It means your meta description, which should lead in to the question and get readers to click and read more. It means using the appropriate H1 tag for your title and different subheads for the rest of your page. It means using schema.org markup if you implement it across your site, to give Google and the other search engines structured data to look for. It means marking links appropriately as either followed or nofollowed, as the case may be.
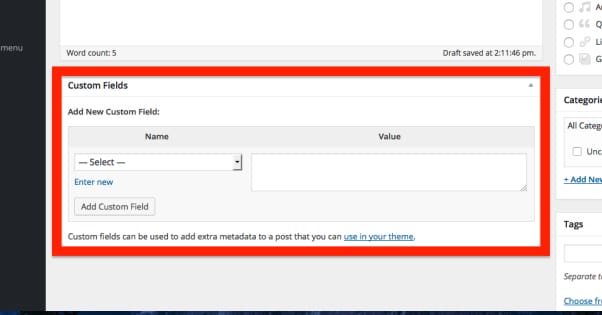
You’re not just dealing with obvious content on the web these days; you’re dealing with as much or more meta information that helps the robots of the world provide that content to the people of the world in an appropriate manner.
Step 8: Publish the New Blog Post
Once you have the post written, it’s time to publish it. Figure out where in your content schedule it can fit; you should have an editorial calendar stretching out a ways, so you should have plenty of options for placing it. You don’t need to rush it in; if it’s coming form an old video, it’s probably not a timely issue. This is going to be more evergreen content, so it doesn’t need priority publishing.
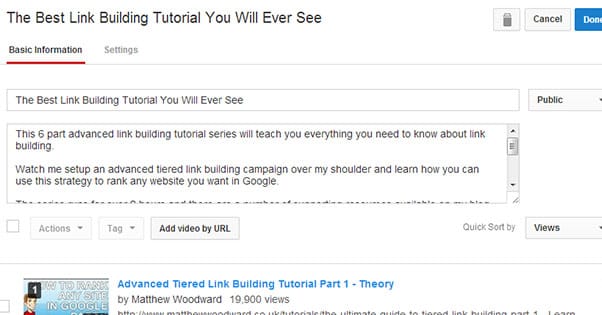
Step 9: Edit the Video Description to Promote the Post
If you have access to the account where the video came from – and if you own the account, I’m not advocating you hack a YouTube account to edit some descriptions – you should edit the description of the post to include the link to your new post.
I like to position the link right up at the top, so it shows up above whatever description was there. Something like “New <Today’s Date>, updated coverage of this topic here <link>.” This will give anyone who happens upon the video a route to go to your blog post, your blog, and whatever conversion process you use.
If you don’t have access to the original video description, that’s fine. This is an added bonus, and you may have changed enough about the content that the video doesn’t really relate any more. That’s fine too.
Step 10: Promote the Post Elsewhere
As part of the publication process, you’ll get to decide how much effort you want to put into promoting the post. You can do it passively, by posting it on social media and your usual channels, but not forcing it anywhere. Or, if it’s a highly relevant and promising article, you can promote it more heavily.
In either case, you might consider notifying the people you used as sources, because getting them to share it will get you more exposure and more of a circulation. If the original video wasn’t yours, you can even notify the original poster of the video and say “inspired by your video, we dug into the topic too!” As long as you’re not stealing content, this should work out well.
Step 11: Create Other Content Using the Same Resources
Now you have a bunch of information and resources on hand. What are you going to do with them? If you’re just leaving it with the blog post, you’re wasting opportunity. You can turn the video-turned-blog-article into an infographic, a slide deck, a different, more updated video, or a whole host of other things. Check out this post from QuickSprout for a bunch of ideas and the process you can use to implement them.
This will, ideally, be the start of a heavy emphasis in your content marketing towards multimedia. Whenever you have information and sources on hand, make the most out of them by repurposing your one piece of content into two, three, four, or even more depending on the avenues you’re using for promotion. Never let content die if you can help it.

Drew Hendricks is the CMO of Blogpros and a contributing writer to Inc., Entrepreneur and Success.