How to Use Buffer to Increase Your Blog Traffic
Published by James Parsons • Social Media • Posted November 17, 2015 ContentPowered.com

One thing that comes up from time to time – more so in the last year than in years prior – is Buffer. From context, you can gather that it is an app for some kind of social media purpose, but if you’ve never used it, it’s hard to grasp just what it is and what it does. This is made more complicated if you were to search for such generic terms as “what is buffer,” which will get you quite a bit of information about machines that shine cars, and not a lot about social media apps. So let’s discuss Buffer, what it does, and how you can use it for blogging and social success.
What is Buffer?
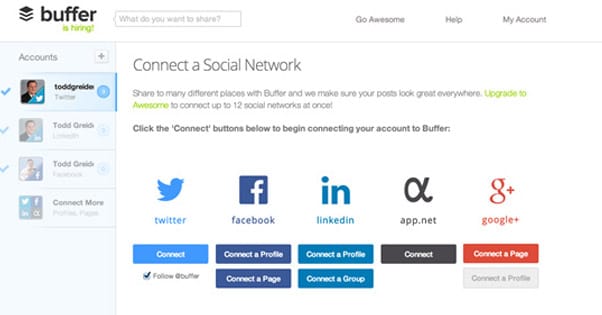
First off, you can find Buffer at the appropriately-named https://buffer.com. They advertise the app as a “social media autopilot,” which will give you a very basic idea of what it is. By default you can sign in using Twitter or register for the service with an email address.
Buffer is essentially a post scheduler with attached analytics, but it has a lot of additional features, particularly as it grows around the web. Let’s look at what it can do.
- From within Buffer itself, create and schedule social media posts to be posted on your various accounts, including Facebook, Twitter, and Pinterest. Notably, it does not have access to Google+ APIs, and thus does not work with that platform.
- Access detailed post analytics about how each post performs in terms of potential and actual reach. Google Analytics integration is included with the Business plan.
- Use a browser extension to curate content you discover from around the web, while you’re reading it.
- Use the apps for either iOS or Android to curate or schedule posts from mobile devices.
In addition, many blogs these days are implementing Buffer as one of their social sharing buttons, which gives you a quick and easy way to share those posts on your various social media accounts with one click rather than using the Facebook/Twitter/etc buttons and being unable to schedule the posts.
So, at the most basic level, what you can do with Buffer is schedule social media posts to appear on a more regular basis, which helps you build your social following, which in turn sends more traffic to your site and helps you grow. That said, Buffer works with other apps online, and can be used in much more innovative ways. To help you succeed, I’ve compiled some of the best ideas I’ve seen and used. Before that, though, you should take a look at the plans and pricing.
How Much Does Buffer Cost?
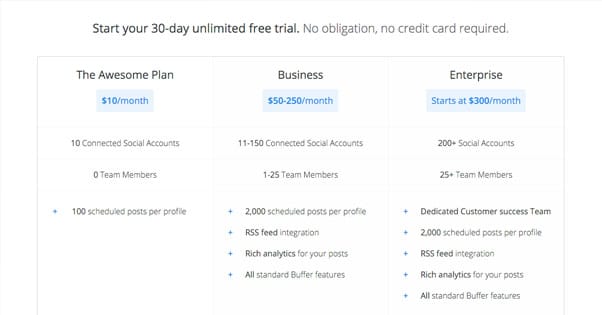
Buffer has five different tiers of plan, though the top three are mostly just a matter of scale.
- Individual: This plan is made for one person to manage a couple of social media accounts and as such is completely free, but also somewhat limited.
- Awesome: This plan is made for power users and entrepreneurs running blogs they’re serious about. It includes basic analytics, and costs $10 per month.
- Small Business: This is the first tier of business plan and as such includes business analytics, as well as the other additional features that come with all business plans. It costs $50 per month.
- Medium Business: A step higher, for more profiles, more sites, and more posts. $100 per month.
- Large Business: The top tier plan for enterprise-level sites. $250 per month.
The individual plan is the most limited, and you can only connect one account for each social network. One Twitter, one Facebook, etc. It also limits your queue to 10 scheduled posts per profile at a time. You are also limited in granularity for your post scheduling. You can choose days and times, but not different times for different days. You need the Awesome plan for that.
The Awesome plan allows you to connect up to 10 social profiles and does not limit them per network, so you could have 5 Facebook and 5 Twitter, or 10 Twitter, or whatever distribution you need. It also increases your post schedule queue to 100. This tier also allows you to connect RSS feeds.
Normally, connecting to Pinterest is an Awesome-tier feature, but there’s a 7-day trial you can activate to get it on your Individual plan.
The business tier allows you to skip up to 25 profiles – more for the higher business plans – and gives you the ability to include team members to help you manage everything. Google Analytics integration is also included, as is UTM functionality and reporting.
If you’re interested in the business tier plans, but aren’t quite convinced, Buffer’s blog has a series of articles that include case studies with successful clients. You can read them here.
Now, where was I? Oh yes, the usage tips. Let’s dig right in.
Create a Long-Tail Post Repetition Schedule
When you publish a blog post, typically you publish the link to your social media profiles immediately. This is a good practice, assuming you’re publishing your content at a reasonable time, and not at 12:01 a.m. when no one is awake to see it.
The trick that many people forget to use is sharing the same post a few more times throughout the coming weeks. Too many marketers feel like this is spam and try not to share the same post more than once.
The key is to recognize that each time you share the post, you’re very likely showing it to an entirely different audience. On Facebook, for example, only something like 6% of your audience sees your post when you show it. What are the chances that, the next time you post it, the same 6% see it? Maybe 1% of them will be the same, but others will be different, or will have overlooked it the first time but will pay more attention the second.
The way you succeed with this strategy is to adjust your repetitious sharing depending on the social network you’re using. Twitter, for example, can support a lot of repetition. You can post the link when you publish the post, and two hours later, and the next day, and once or twice the next week, and a few times the next month, and on and on. Facebook, meanwhile, doesn’t support quite so much repetition. It’s best to share the post on publish, and then wait a couple of months before sharing it again, so other content can circulate.
Interestingly, this frequency is somewhat independent of the size of your audience. It’s more dependent on the social network, and how that network handles multiple posts in a short time. Facebook doesn’t really like when a page posts more than 5 times in a day, regardless of how large the audience is. Twitter doesn’t care if you post 5 times an hour all day.
Don’t forget to change up the post each time you share the link. People get tired of the same post repeated ad nauseum. Change the displayed title, change the copy of the post, even change the meta description if you want. Try out different formats for your post as well. Which works best; a quote, a factoid, a question, a clickbait variation? Perform experiments with styles and refine those while you repeat.
Use the Optimal Timing Tool
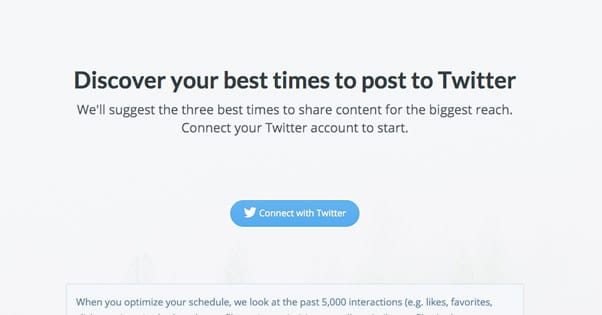
The Optimal Timing tool is a tool provided with Buffer that integrates with your Twitter account. It only works with Twitter, but you can take the information you gain and extend it to your other profiles, because it’s likely going to be similar.
What the tool does is scans the past 5,000 interactions you’ve had on Twitter and plots them against time of day. They do the same thing for similar accounts in the same time zone as you, and compare those plots. The data they produce will indicate what times of day earn you and similar people the most engagement.
You can use this information to passively boost your engagement rates, and thus your views, shares, and traffic, just by posting at the right times. You don’t even need to change your frequency, though you can if you want. It’s a very simple route to success.
Schedule Other Content
You don’t need to always just schedule your own posts. In fact, a lot of what you post on social media shouldn’t be your own content. This is very self-promotional, and tends to get people to turn away. Look, for example, at George Takei’s Facebook page. He’s very prominent and very popular, and he got that way with a very specific strategy. He publishes a lot of content, but very little of that content is his own or relevant to him or his career. Most of it is clickbait content with an emotional angle. It’s heartwarming, it’s frustrating, it’s outrage-inducing, it’s controversial, and so forth. None of it is boring, bland and faceless content. George Takei isn’t a content creator, he’s an engine for viral exposure.
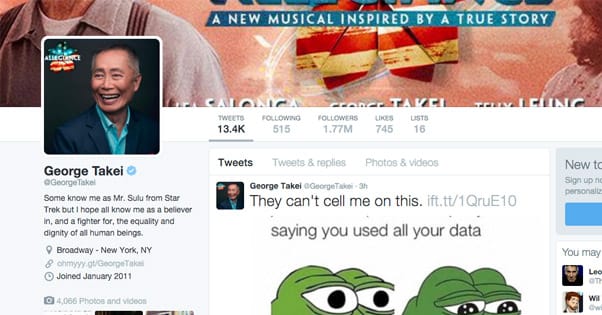
Then, occasionally, he will post something relevant to him. His posts about personal life events, his posts about politics, his posts about his musical; these are all self-promotion, but they’re welcomed because they’re the exception rather than the rule.
The pure power of content creation lies in volume. If you’re posting on your blog three times per week, that’s giving yourself three posts per week on social media. If you couple this with sharing the same post more than once, you’ll end up with 5-10 posts per week, but it’s still all your content. If you curate content, though, you can post more often.
The benefit of curating content is that you can post content that is not yours, which means you didn’t have to spend time and energy creating it. It might also be better than yours, which draws people into watch or follow your social profiles because of that content, and keeps them around when your own content is posted. Rather than trying to create competing content, you can curate content and leech value out of it. In some cases, promoting that content even gets you in the good graces of the person who created it, making them more likely to share your content in return.
There are many theories about how often you should curate, but I like the 5-3-2 rule. It works because it applies to any social network, and simply goes off of the total number of posts rather than some per-day metric. It looks like this: out of every 10 posts,
- 5 of those posts should be curated content.
- 3 of those posts should be branded content from you.
- 2 of those posts should be more personal, non-business content from you.
You can adapt this a little differently if you’re not posting more personal content. I also like this:
- 6 posts should be curated content.
- 3 posts should be branded light sales content.
- 1 post should be deeply promotional, hard push sales content.
This gives you a slightly lower ratio of your content to curated content, but also allows you to include more high pressure sales on a regular basis. How do you define these types of content? I consider “light sales” content to be things like this blog post, where it’s branded but it’s not pushing our business model. It’s here to build our reputation as an authority and to give you valuable information, not to sell anything. Meanwhile, the high push sales content is something more like a landing page, a product-focused infographic, a white paper, or an ebook announcement.
Buffer is great for content curation, but you still need to know the rules. If you’re not careful, your attempts at content curation could turn out to look more like content theft, and that’s about as far from beneficial as you can get.
- Reproduce as little of the original content as possible in your post. Keeping a title and meta description is fine; copying the whole article and pasting it on your blog is not. Thankfully, the easier route with Buffer is to share a link, so this should be no problem even accidentally.
- Avoid curating everything from one source. If you post everything Bob’s Blog posts, you’re not curating their content, you’re absorbing it. You also look like an affiliate, which isn’t beneficial to organic marketing.
- Be selective in what you curate. Curated content should be as high value as possible on average. The better the content you curate, the more people will be interested in watching you to see more.
- Always identify the original source of the article. Content curation is essentially about sharing links, not about copying content.
- Always attempt to add some value or context to the content you curate. Don’t just post a link with no copy attached; add something to it. Quote a statistic that made you think, copy the most compelling line, or add something from your perspective that makes the post interesting.
Proper content curation is all about bringing legitimate value to your users, and doing it in a way that is both convenient and better than going to the original source of the posts. If you’re only curating from one source but interjecting your marketing posts, your readers will just go follow that source instead. If you’re curating 10 sources and adding your own insight to them, that can’t be found anywhere else anywhere nearly as conveniently.
Link IFTTT and Buffer for Benefits
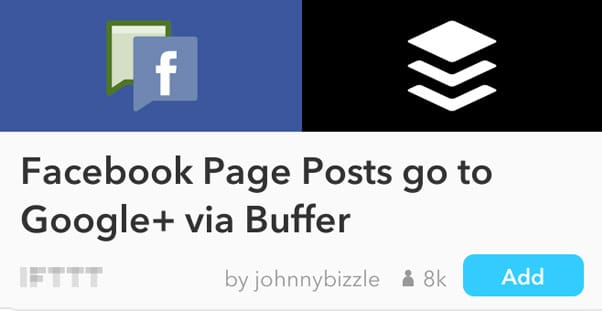
IFTTT, which stands for If This Then That, is an engine of cause and effect. You can use it to, when you perform one action, automatically trigger another to be performed. These can range from the very simple “if the weather is rainy, trigger a phone alert” to more complex email-based and social media setups.
The first thing you need to do is set up an IFTTT account at www.ifttt.com. Once you have that, you need to set up the Buffer channel here. This links the accounts and allows you to use Buffer triggers.
You can browse some Buffer-based “recipes” as IFTTT calls them, or you can make your own. Here are some ideas.
- Set up a recipe so that any time you favorite a tweet, that tweet is scheduled for posting on through Buffer.
- Set up a recipe that notifies your social media following about upcoming events listed on Google Calendars.
- Set up a recipe that monitors your RSS feeds and posts updates from them on your social profiles. Note that this is an advanced function of the paid Buffer accounts, but you can use IFTTT to mimic the feature.
- Use IFTTT to monitor social networks Buffer doesn’t, like Instagram or Google+, and trigger social events on other accounts based on those posts.
There’s a lot you can do with this very robust combined engine. All it takes is a little creativity and you can automate a lot of what you spend time doing every day.
Do you have any other favorite uses of Buffer? If so, let me know. I’d love to see what ways other marketers are using the app.

James is a content marketing professional who enjoys writing useful content for bloggers. He’s a contributing writer at Forbes, Entrepreneur, Inc, and Business Insider.