How to Install SSL on Your Blog to Improve Rankings
Published by Drew Hendricks • Search Engine Optimization • Posted September 29, 2017 ContentPowered.com
Installing SSL can be pretty beneficial for your website. You see increased security, increased trust, and even a bit of SEO benefit for adding encryption to your traffic. However, it can seem like a daunting task, especially if you’re not an expert in setting up websites.
What I’ve done here is given you a quick tutorial for setting up SSL on a few different website architectures. I’ve covered probably the three most common; Apache, CPanel, and WordPress. Yes, I know those aren’t all equivalents; bear with me.
Step 1: Ensure Access
In order to actually use SSL on your site, you need to be able to access the server in such a way that you can validate that you own it. If you’re not the one in control of your web server, the person who is will need to be the one adding SSL.
Generally, what you need is called Domain Validation Rights. What this means is that you need access to the email address that was used to register your domain name, as well as access to upload files to your web server. If you don’t have access to the email, when the certificate authority tries to validate your ownership of your domain, you won’t be able to validate. If you can’t upload files to your web server – like you’re using a shared WordPress.com host or something – you won’t be able to upload the certificate files.
Some shared hosts have their own versions of SSL that they can implement on your site for you. If you’re running a site on a freehost of that variety, you need to contact them to set up security.
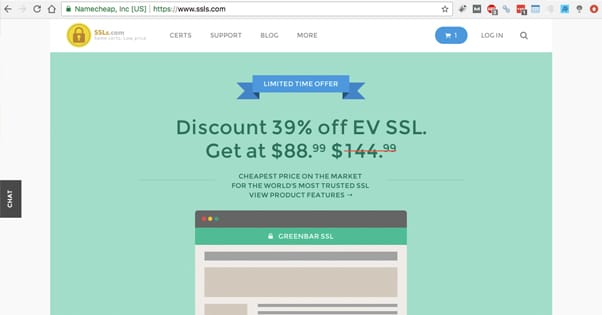
Step 2: Buy a Certificate
Regardless of your site architecture, you’re going to need to actually buy a certificate. I highly recommend that you avoid using a free SSL provider; the certificates they provide aren’t worth the effort to implement. Instead, use one of the primary certificate authorities and buy a good certificate.
There are three types of certificates, but you only need one. Which one you need depends on the kind of domain structure you use for your site.
- If you use http://example.com/folder structures, where every different page uses a different subfolder after the .com/, you can use a single domain certificate.
- If you use both example.com and www.example.com, or if you divide up your site by subdomains, like store.example.com and blog.example.com, you need what is called a wildcard certificate. These tend to be more flexible, and are generally the standard for most sites. They are, however, generally more expensive.
- If you use several different domains for your company, like if you register both the .com, the .net, and the .org versions of your domain, you will need to get an organization-wide certificate and validate multiple domains. To do so, you need a multiple domain certificate.
Every other variation on a certificate either comes in how they want to validate that you are who you say you are, or are add-ons that extend the value and make you want to purchase from them. Things like warranties, assistance setting up the certificate, cost reduction, and other add-ons are intended to influence your decision to purchase.
Step 3: Install the Certificate
The actual process of installing a certificate includes generating private keys, generating a certificate signing request, uploading the certificate itself, and making sure everything is in place. This is where variation come sin based on your site architecture.
For cPanel, you first need to log in to your cPanel dashboard. Find the SSL/TLS Manager and click on it; it’ll be in the security section. Under the Private Keys section, click to generate a new key. Enter your host name – your domain – from a list or by adding it manually. Select 2048 for the key size, unless your certificate says to choose something different. Click generate, then return to your private keys list.
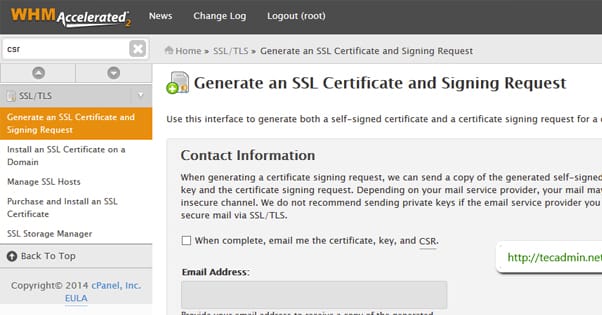
Next, click to generate a new certificate signing request. Fill in the information it asks for, including your domain name, country, city, company, and email address. Click to generate it. You will be asked to copy it and give it to the certificate authority you bought your certificate from.
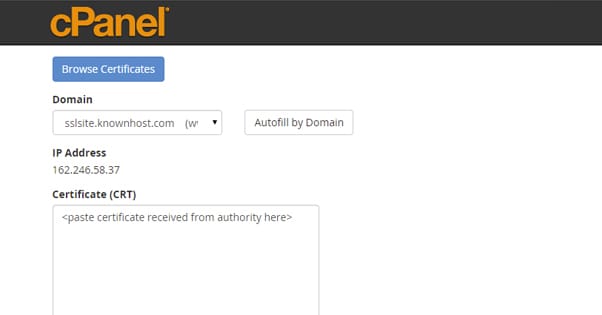
The certificate authority will give you a .CRT file, which is the certificate extension. In the SSL/TLS Manager, click on your certificates section and paste in your certificate information. This is your private key and whatever else it asks for. Click to upload your certificate file as well.
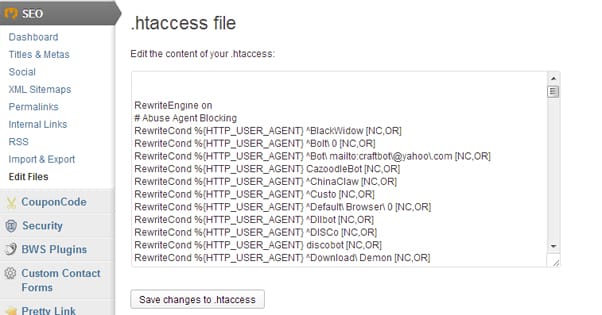
You may also need to edit your site URL. With WordPress, this means you need to modify your .htaccess file. Add the code on this page and test it. What this code does is forces people who visit your site to use HTTPS rather than HTTP, so they get the security you want.
For Apache servers, you need to go through the same basic process to create your private key and generate your certificate request. You will need to run something like
- Openssl req –newkey rsa:2048 –nodes –keyout example.com.key –out example.com.csr
This generates files with the key and request, which you can use to get your CRT file. It will ask for information like your location, which you will need to provide.
Next, open your Apache config file and add some code to the virtual host section. You can see an example of this code here.
For general WordPress sites, if you don’t feel like going through this whole process manually, you can use a plugin to do the same thing. Really Simple SSL will automatically detect the settings that need to be changed in order to move your entire site to SSL. You can’t do partial site SSL and you can’t configure the plugin in most any way; it’s meant for a lightweight installation, not a robust configuration.
Just like any WordPress plugin, simply download the plugin and add it to your server. You need to install your certificate normally, according to the instructions provided by the certificate authority who sells it to you. Then download the plugin, upload it to your plugins directory, and find it in your admin dashboard. Run it and it will enable SSL for you.
Step 4: Check for Appropriate Redirects
Once you have the SSL certificate set up, you need to wait for a few minutes to make sure the changes have all taken place. Once that’s done, you need to make sure your site is properly encrypted.
Ideally, you will have set something like in the cPanel example, where you force users who visit the HTTP version of your site to be redirected to HTTPS. However, sometimes you have to do this manually. Not everyone is going to be using a browser extension like HTTPS Everywhere, after all.
If you use any Linux-based architecture, like cPanel, you need to modify your .htaccess file. Add the lines:
RewriteEngine On
RewriteCond %{HTTPS} off
RewriteRule ^(.*)$ https://%{HTTP_HOST}%{REQUEST_URI} [L,R=301]
This code makes sure anyone visiting through HTTP is redirected via a 301 redirect.
If you instead are using a Windows-based architecture, like Plesk, you will instead need to add some slightly more complicated code to your web.config file.
<configuration>
<system.webServer>
<rewrite>
<rules>
<rule name="HTTP to HTTPS redirect" stopProcessing="true">
<match url="(.*)" />
<conditions>
<add input="{HTTPS}" pattern="off" ignoreCase="true" />
</conditions>
<action type="Redirect" redirectType="Permanent" url="https://{HTTP_HOST}/{R:1}" />
</rule>
</rules>
</rewrite>
</system.webServer>
</configuration>
Once this is done, try to visit your website using a HTTP variation of the URL. You should be taken directly to the page on HTTPS, which you can verify in the URL.
If you end up on a 404 page or if you’re still on the HTTP page, you need to figure out what went wrong. A 404 page is very bad; landing on it means Google will see that your entire site disappeared, and your Google rankings will tank. If the HTTP version is still available, it simply means that your site can be accessed via unencrypted channels as well as encrypted channels. Sometimes this is intentional, but often times it’s better to force security whenever possible. It’s up to you which you prefer, and how much troubleshooting you’re willing to do.
Step 5: Check for Broken Links
Next up, it’s time to go over your entire site and look for internal links. One problem that a lot of sites end up having after a migration to SSL is that their internal links lose a lot of value, because they’re now passing through a redirect. Redirects almost always lose a little bit of SEO value simply due to the nature of the beast.
My favorite way to deal with this issue is for WordPress sites. You have a plugin available called Broken Link Checker. This plugin will scan your entire site and will check every link on it, both internal and outward. It will try to resolve the page at the other end, and will report back with info like whether the site at the other end no longer exists, if the page 404s, if the link passes through a redirect, and if it works just fine.
This is a great time to do a link audit as well. Here are some guidelines.
- Every internal link should be changed to point at the HTTPS version of the site instead of just at the HTTP version of the site. While you’re at it, you can also see if any of your internal links are pointing at old pages or resources that no longer exist, and you can move or change those links.
- External links that go through a redirect might need to be edited. Sometimes it’s the same issue as with internal links; pointing at HTTP instead of HTTPS. Sometimes the target site changes domains. Sometimes a page is redirected to an entirely new page, which might be worth removing the link.
- External links that go to a 404 or another form of broken page should be removed. If the host page on your site still has any form of traffic or value, you can replace the link with an alternative resource. If not, it doesn’t really matter if the link disappears.
You don’t need to go through every link on your site, but it might be worthwhile to audit at least the most important pages, since you’re already using a link analysis tool.
Non-WordPress sites, by the way, can use something like this web-based tool instead. It’s limited to 3,000 pages, so if your site is larger you’ll need to pay for an upgraded version.
If you’re feeling up to it, you can also do a backlink analysis of your site and identify the most influential sites linking to you. When you find their pages, you can compile them and send out emails notifying them of your change in URL, requesting that they update the links. It can’t hurt, right?
Step 6: Update Site Info with Google Webmaster Tools
The final step is to let Google know that you’ve made this change. They’ll find out eventually, of course, but it’s worth telling Google that you made the move. What you need to do is add your new URL as a new property in Webmaster Tools.

You might have done this before, actually. Some best practices say that you should add both HTTP and HTTPS as well as both WWW and non-WWW URLs to Webmaster Tools. This way all data about your site is harvested even if the URL varies.
However, if you just added your preferred WWW variation with HTTP, you will need to add the new property with HTTPS. You may be asked to add or confirm verification code with your site; just follow the steps Google asks for and you should be good to go. When done properly, this means your Google analytics data will have continuity, though you’ll get a different set of referral data due to the ability to get HTTPS referral information.
Finally, it might be worthwhile to generate a new sitemap and submit it to Google. They’ll be able to crawl your site on their own, but it’s always a good idea to have an up to date sitemap added to their systems regardless. Again; it can’t hurt, and can help them discover some pages they may have missed before.

Drew Hendricks is the CMO of Blogpros and a contributing writer to Inc., Entrepreneur and Success.