How to Set Up Article Auto-Posting on WordPress Blogs
Published by James Parsons • Content Marketing • Posted August 4, 2015 ContentPowered.com
Scenario: you run a blog that publishes posts once a day, seven days a week. You have an important family gathering to attend for three days in the middle of the week, in a location where you will not have access to the Internet. What do you do?
Some people will bring their devices and go out of their way to find an Internet connection. Some people will bring cell phones with good data connections, tether them, and use that connection to publish their daily posts. The pros, though, the pros do something different.
The pros schedule their posts to post automatically. Before they leave on their vacation, they schedule up those posts that they would miss. Then they go on their vacation, secure in the knowledge that no one on the other side of the curtain will even know they were gone.
Of course, there are those rare occasions where some setting fails to trigger, or a button isn’t pressed, and the articles don’t go up on time. That’s just a risk you have to take to avoid being a technological buzzkill at your family gathering.
Thankfully, these days it’s both an easy process and pretty foolproof to schedule posts properly. I’ll show you how, and how you can do other things to enhance the process.
The Preshow: Determining Article Topics
The first thing you have to do is something you have to do before you write any blog post, regardless of when, where or how you intend to post it. That’s determining a topic.
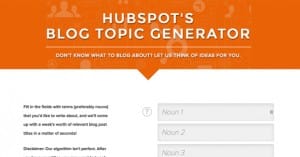
There are a ton of ways you can do this. Maybe you have monthly brainstorm sessions and come up with dozens or hundreds of ideas you can wrangle into posts. Could be you do a quick scan of other blogs in the industry looking for inspiration, or for posts you can “reply” to. Another option is to just go about using keyword planners, trend watchers and title generators to take all of the guesswork out of things.
One important distinction is you’re not trying to come up with workable titles, you’re just trying to come up with topics. You can always come up with a better title later. A topic is just a general hint of what you’re doing, and can be as simple as a keyword phrase or as complex as a press release.
If you find yourself in desperate need of assistance in coming up with topics, try using a process like this one. There are a bunch of different creative processes written about online; find one that works for you and get into the habit of using it.
Step 1: Write Your Posts
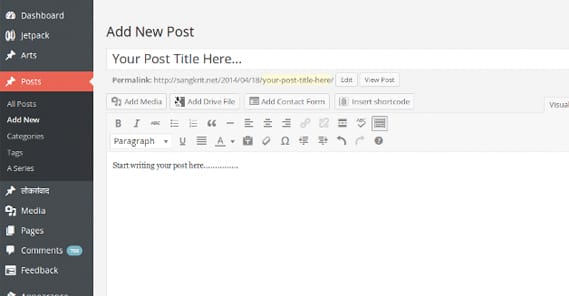
Once you have a topic or a set of topics for the posts that will be posted on the days you’re going to be gone, it’s time to write those posts. The topic will largely guide where the post goes, but you’ll also want to keep a few other factors in mind. For example, you want to know about how many words you’re aiming to reach. You don’t want to try to write 3,000 words on a thin topic; you’ll end up with a post full of fluff and light on information.
You’ll also want to decide on the format. Are you writing a blog post with statistics and detailed information? Are you writing one with step by step instructions and screenshots to show a user what to do? Are you making up a top 10/20/30 list? Are you creating a slideshow with descriptions for a series of images?
As for the text itself, all of the common advice applies. Frequent subheadings, plenty of links to both internal and external pages, an appropriate usage of the keyword, short paragraphs and so forth.
Step 1b: Proofread Manually or with External Tools

Once you have a completed post, you’ll want to give it a once- or twice-over to make sure the grammar, spelling and language use all works. This can be difficult if you’re not a native English speaker, but even natives can make mistakes. English grammar is complex and often nonsensical. Read the post with fresh eyes, ideally after you’ve taken a break, so you can spot typos and misuses of words you didn’t notice while writing.
In terms of automated tools, one I like is Grammarly. It’s very much like the built-in spelling and grammar checks that come with programs like Word or Chrome, but it has a much more robust engine for locating mistakes with commas, misused words and correct spellings in incorrect places.
You can also use a style checker like Hemingway. Hemingway doesn’t analyze your grammar; it analyzes your writing style, looking for issues that might come up like overly long, complex sentences and complex words where simple words will do. That sentence wouldn’t pass; it’s too long.
Step 2: Fill Out Meta Information
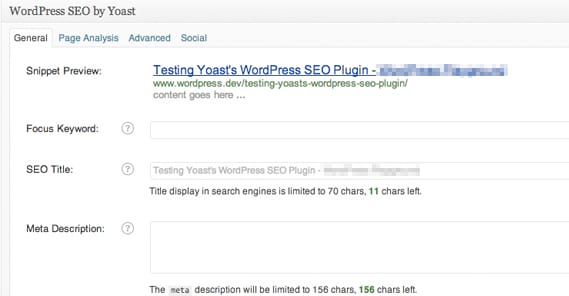
WordPress by default has a few places to put meta information. You can add more if you’re using a plugin like WordPress SEO by Yoast. You’ll want some kind of SEO plugin, though ideally you’ll avoid a plugin that grades your writing by arbitrary guidelines. SEO is very adaptive, and no one set of rules will always apply.
What meta information do you want to include?
- Title. Your meta title should match the title of your post, but I’ve seen sites use different titles and get away with it. I often find that the disconnect makes it difficult for readers to return to a post they remembered, however.
- Description. Your meta description shows up in Google under the title in blue, and it’s a couple sentences where you can convince users to click. A short, punchy description that attracts users is perfect.
- Image alt tags and descriptions. This is more a usability factor than an SEO factor, but it will help your images rank in image search, as well as giving you additional chances for a bit of keyword optimization. Don’t spam your keywords, though!
Never bother using the meta keywords field. Most of the sites that use it tend to be spam sites, so Google doesn’t look highly upon using it.
As a side note, I want to talk for a moment about keyword emphasis, keyword density, and keyword usage in general. I find that you don’t really need to focus on a keyword at all. If you’re writing a post about making videos for YouTube, chances are you’re going to be using a phrase like “making a video for YouTube” fairly frequently. It makes sense in context, even though it might go over a “recommended” keyword density. You won’t be penalized for it, because it’s contextual and accurate.
The only time you are penalized for keyword optimization is when you’re using a tertiary keyword too often. These keywords don’t sound natural and they don’t read right. Ironically, it’s only when you start to put a lot of emphasis on keywords that you fall into the trap of using obscure keywords too often.
In general, just pick your topic and write about it. The keywords will emerge naturally. If the keyword you want to target isn’t showing up, you’re writing about the wrong subject.
Optional Step: Research Optimal Date and Time
You may have done this already, or maybe not. Some bloggers don’t really pay attention to timing and just post their updates whenever they have them done. Others shoot for a generic and predictable time, like noon every day. Honestly, a lot of the time, the exact timing of your posts isn’t going to have a huge impact. It’s the timing of social sharing, particularly on fast-moving platforms like Twitter, where it really matters.
The thing is, if you’re using some of the later steps I’m going to mention here, you’re going to trigger social posts to be made the moment your post goes live on your site. That means you’re going to want to post your blog post at an optimal time in order for those social posts to go up at optimal times.
So when is the right time to publish a post? Studies vary. There isn’t a lot of data available, but I tend to think that different industries have different optimal times. In general, though, you can make a few assumptions.
- If you post during peak hours in the mid-afternoon, you will likely see more traffic and more engagement, but also higher bounce rates and more competition due to the press of other people posting at the same time.
- If you post during off-peak hours, such as late evening or early morning, you will have more dominance over the feeds, as everyone else posted during peak hours. You will also find it easier to reach “front page” status on sites like Reddit or Imgur, if you use them for promotion. On the other hand, overall traffic will be lower, because people will be doing other things. Like sleeping.
I recommend studying the publication dates and times for your most popular articles, and for your least popular articles, looking for trends. If anything stands out, you might try to experiment with publication times to see what bears fruit.
Step 3: Change Publication Date and Time
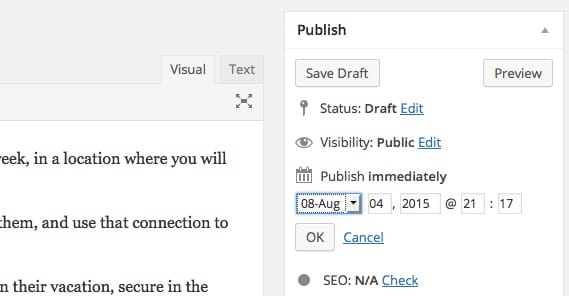
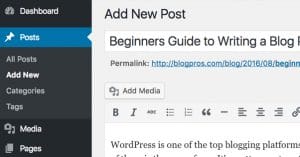
Alright, now with your post created, it’s time to schedule it. By default, you can do this with a basic WordPress installation. It’s a very easy process. All you need is a post filled out and ready to published, possibly saved as a draft just in case something goes wrong. You also need the date and time you would like to publish the post.
The first thing you need to do is look to your WordPress article dashboard. You’ll see a small box in the corner labeled “Publish.” This box will have two buttons at the top, one labeled save draft and one labeled preview. Beneath that you will see status, which should be in draft. Below that is visibility, which doesn’t matter for this exercise. Below that it has a “Publish Immediately” entry. Click “edit” next to this.
When you click edit, a date and time field will appear. This is where you input the month, day, year, and exact time you want the article to be published. You can set this down to the exact minute, so you have very precise control over when the post goes up.
When you set the publication date to anything later than the current time, the bottom blue “publish” button will change to a “schedule” button instead. Make sure you have clicked OK on your date and time, and then click “schedule.” That’s it! You’re now done with the whole process.
Step 3b: Prioritize Fresh Content, Delay Evergreen Content
When you know what day and time you want to schedule something in a given week, that’s great. There’s one more concern for your scheduling that you might not have thought about, though.
A lot of times, I see bloggers schedule their posts in a sort of first come, first served basis. They write a post and schedule it for the day after the previous post. There’s no thought put into the content of the post or the order the posts go up.
The primary reason you want to take a step back and look at the content is the importance of timely content. If blog A publishes an article and you write a response, you want that response to go up as soon after the original post as possible. Even if you have a month’s worth of scheduled posts waiting in the wings, you’ll want to delay them in order to post up the one time-sensitive post.
On the other hand, if you wrote a long and detailed guide to something that hasn’t been trending in a while, you can afford to delay that post. There’s the small chance that it will trend and you can prioritize it; otherwise it’s fine to let it be “filler” for in between more time-sensitive posts.
Optional Step: Use an Editorial Calendar Plugin
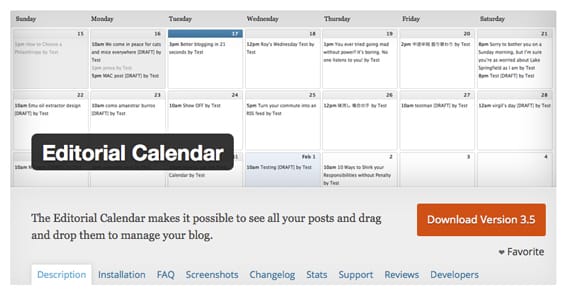
An editorial calendar gives you more control over the scheduling of your posts than you get from the basic scheduler. In essence, it gives you a large graphical representation of what posts are being published when. This is pretty valueless when all you have are a few posts you’re scheduling during vacation. However, if you’re getting in the habit of scheduling a week or so in advance, it’s a good tool to have. If you’re running a large blog with multiple contributors, all filtered through the platform rather than through a single editor controlling the schedule, it’s invaluable.
There are a bunch of different editorial calendar plugins you can use for WordPress. Some of them come with exceptional team management and collaboration tools, while others have features to help with workflow management. Some, of course, just have the basic calendar and not much else. Pick the one that works best for you and your team.
Step 4: Promote on Social Networks with Cool Tools

This is a step I alluded to earlier, when I talked about determining the best date and time to publish your posts. Essentially, using some plugins I’ll mentioned in a moment, you can tell WordPress to push updates to certain social media accounts the moment your blog post goes live. This allows you to partially automate your social media promotion even when you’re not around.
As an aside, you never want to fully automate your social media posts. Make sure you’re around for replies and interaction, otherwise your users will stop interacting with you. The more you seem like a robot runs your accounts, the less people will want to follow those accounts.
Now, for the tools:
- Jetpack Publicize. This plugin adds a publicize option to the Publish box in your article dashboard, the same place you use to schedule. It works with a bunch of different social networks, via linking your accounts. It’s great primarily for Facebook and Twitter.
- WP AutoSharePost. This is a much more technical plugin that requires you to create small custom apps for Facebook and Twitter if you want to use them. However, its primary benefit is that it pulls Facebook comments in and posts them as comments on your blog, further unifying your online presence.
- SocialPublish. This one isn’t so much a plugin. Instead, it’s a web app, with all of the same features as something like Jetpack. Custom messages are fully supported.
- NextScripts. This one isn’t as variable as some of the other plugins, with little more than a checkbox to auto-publish posts when you make them. The difference is, it supports far more social networks, including Pinterest, Blogger, and Tumblr.
Bonus: Automatic Curation, Zero Inputs
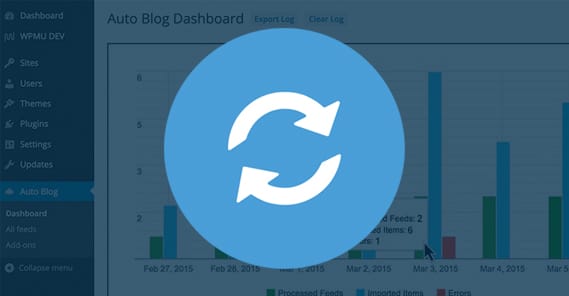
There’s one more item I’d like to mention, but before I do, I want to say that you need to be very careful using it. It’s a tool that allows you to pull content from other locations, like other blogs, and publish it on your own blog automatically. You can choose to repost all content from a given blog, or just content in certain tags. The trick is, it’s very easy for this to be abused. Always make sure you’re not stealing content; at the very least it needs to be properly attributed. Whenever possible, just use it to curate content to supplement your own original content.
The plugin in question is WordPress Autoblog. You can find it here. It costs $19 per month, or you can get a membership to wpmudev, which costs more, but gives you access to a bunch more useful plugins. Which you do depends on what you think of the rest of their plugins.

James is a content marketing professional who enjoys writing useful content for bloggers. He’s a contributing writer at Forbes, Entrepreneur, Inc, and Business Insider.