




The connection between your WooCommerce store and Google Merchant Center matters more than most integrations. WooCommerce powers roughly 6 million live websites and Google controls about 85% of the global search market - which means the path between your product catalog and the people looking for it runs directly through Merchant Center. Get that connection right and your products show up in Google Shopping, Performance Max campaigns and free product listings. Get it wrong, or let it silently break, and you're basically invisible.
This guide is for store owners who are plugin-averse, troubleshooting a broken integration, or simply wondering what's actually happening behind the scenes when your store talks to Google. We're going to talk about the manual strategy: building a product feed that Google can read, authenticating your store through OAuth, and tools like Google Sheets to manage and validate your data. None of it requires a plugin, and it's easier than it sounds.
Before jumping into the steps, it helps to know what the connection actually means - because once you see the underlying structure, the whole process starts to make quite a bit more sense.
Key Takeaways
- Google requires three things before showing your products: verified site ownership, a valid product feed, and structured data on product pages.
- WordPress site verification can be done via HTML meta tag or file upload; theme updates can erase meta tags, making file upload more stable.
- Google Sheets works as a direct feed for stores with fewer than 100 products, syncing automatically every 24 hours without file generation.
- The Content API with OAuth 2.0 enables live WordPress-to-Merchant Center syncing; using the wrong scope returns a 403 error.
- Common feed errors include price mismatches, missing GTINs, policy violations, and undersized images - all fixable via the Diagnostics tab.
What Google Merchant Center Actually Needs From Your WordPress Store
Before Google will show your products in Shopping results, it needs to trust that your store is legitimate. That your product data is accurate. That trust-building process depends on three things: verified site ownership, a valid product data feed, and structured data that helps Google read your pages correctly.
Site ownership verification is the first gate to get through. Google needs to confirm that you control the domain you're submitting products from. If you don't complete this step, nothing else moves forward - it's an absolute requirement in the setup process.
Once your site is verified, Google needs a product feed - a structured file that lists your products along with facts like price, availability, title, description, and image links. It's a standardized way to hand Google the information it needs to display your listings correctly.
Structured data is the third piece - code added to your product pages that marks up the content in a way Google can parse automatically. It helps Google understand what type of page it's reading and pull accurate facts directly from your site. If you don't have it, even a product feed can run into problems during review. You can check your markup using a structured data validator before submitting.
There's also a timeline to keep in mind. After you submit your store for review, Google usually takes 3 to 5 business days to check whether your site and feed meet its policies. Your products won't appear in Shopping results until that review is complete, so it's worth building that window into your expectations from the start.
The table below gives you a quick look at what each requirement does and why it matters:
| Requirement | What It Does | Why It Matters |
|---|---|---|
| Site Ownership Verification | Confirms you control the domain | Google won't accept feed submissions from unverified domains |
| Product Data Feed | Lists your products with required attributes | Gives Google the data it needs to display your listings |
| Structured Data | Marks up product pages in a machine-readable format | Helps Google validate and match your feed data to your site |
| Policy Review Window | Google reviews your store and feed for compliance | Products won't show in Shopping results until this is approved |
Each of the next few sections walks through one of these in detail, covering what to set up and in what order. If you're also setting up an online store for the first time, it may help to review shopping cart plugins that work with WordPress before diving into the feed configuration.
How to Verify Your WordPress Site Ownership in Google Search Console
Before Merchant Center will trust your store, you'll have to prove you own your domain. That happens through Google Search Console, and it has to be done first - Merchant Center checks Search Console to confirm verification before it accepts your site claim.
Google gives you a few ways to verify. But the two that work best for WordPress are the HTML meta tag strategy and the HTML file upload strategy. The meta tag strategy is usually faster to set up.
Using the HTML Meta Tag Method
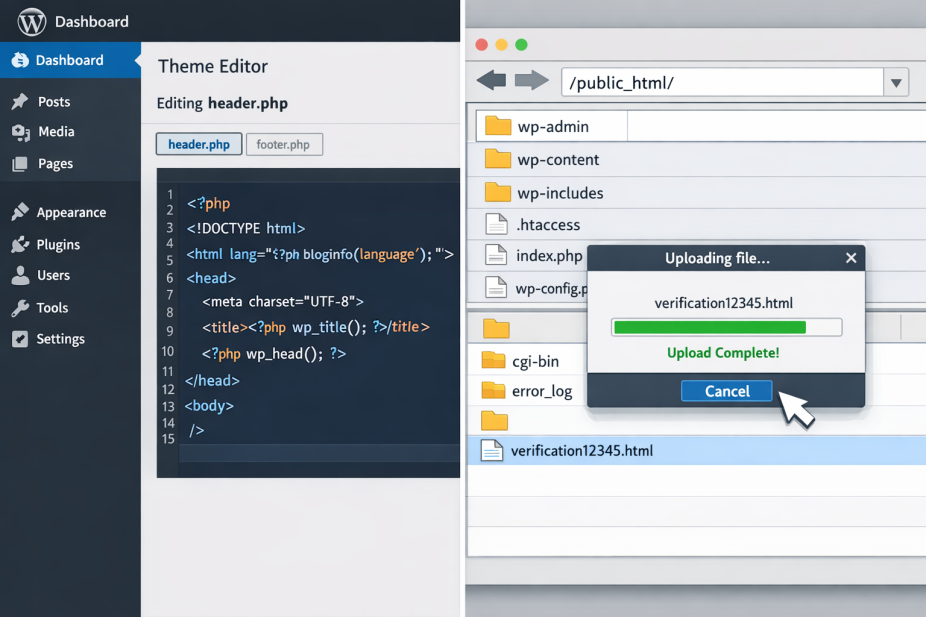
When you choose this option in Search Console, Google gives you a small snippet of code that looks something like <meta name="google-site-verification" content="your-unique-code" />. That tag needs to go inside the <head> section of your site, and it needs to appear on every page - at least on the homepage.
To add it in WordPress, go to your theme's header file. In the dashboard, get through to Appearance, then Theme File Editor, and find header.php. Paste the tag before the closing </head> tag. If you are uncomfortable editing theme files directly, you can also paste it into the "header scripts" field in your theme's settings if that option is available.
There is one part worth watching. Theme updates can overwrite header.php and wipe your verification tag out. To protect against that, you can use a child theme so your edits stay separate from the parent theme files. It is also worth knowing how theme files like footer links work so you understand what gets overwritten and what does not.

Using the HTML File Upload Method
Search Console also lets you download a small HTML file and place it in your site's root directory. You upload this file via an FTP client or your host's file manager, and once Google can access it at your domain, verification goes through.
It is a bit more stable because theme updates won't touch it. The file sits in your root folder and does its job. The one thing to watch for is that the file stays there permanently - if you delete it later, Search Console can lose verification and Merchant Center may drop your site claim too.
| Method | Where It Lives | Risk of Being Overwritten |
|---|---|---|
| HTML Meta Tag | header.php or theme settings | Yes, on theme updates |
| HTML File Upload | Root directory of your site | Only if you delete it manually |
Once Google confirms it can see your tag or file, Search Console will show your domain as verified and you can move forward with the Merchant Center site claim.
Building a Product Feed File From Your WordPress Data
A product feed is a structured file that Google Merchant Center reads to know what you sell - it lists your products in a format Google can parse, and it needs to include attributes for each item. The two most common formats are XML and TSV (tab-separated values), though CSV works too.
Every product entry in your feed needs at least these core attributes to be accepted by Google.
| Attribute | What It Is | Example |
|---|---|---|
| id | A unique identifier for each product | SKU-1042 |
| title | The product name as it appears in search | Men's Waterproof Hiking Boot |
| description | A plain text summary of the product | Lightweight boot with grip sole... |
| price | The listed price with currency code | 89.99 USD |
| availability | Stock status | in stock |
| image_link | Direct URL to the product image | https://yoursite.com/image.jpg |
| link | URL of the product page | https://yoursite.com/product |
If you run WooCommerce, this data already lives in your database. Product titles, descriptions, prices, and stock status are stored in standard WooCommerce fields and post meta. You can query this data with WP_Query or direct database calls and then format the output as XML or TSV by writing a custom template file in your theme or a simple PHP script.
For stores not on WooCommerce, product data is likely spread across custom post types and custom fields. The process is the same - you pull the data, loop through it, and output each attribute in the right format - it just takes more manual mapping. If you're still evaluating your setup, it helps to understand the different ways to integrate a shop on your blog before committing to a structure. But it works.
Remember to watch your images. Google requires a minimum size of 100x100 pixels for standard products and 250x250 pixels for apparel items. Optimizing your product images for Google search can also improve visibility beyond just Shopping results. Images that are too small get flagged and those products might not show up in Shopping results at all.
Here is where store owners quietly lose ground. If your product data is inconsistent - prices formatted differently across products, missing descriptions, or placeholder images - your feed will have errors that are hard to trace back to a single cause. Clean data going in means fewer rejections coming out. If you're also running paid campaigns alongside your feed, be aware of common Google Ads mistakes that can undermine your results.
Using Google Sheets as a Manual Feed for Small Product Catalogs
If your store has fewer than 100 products, you have an easier path available to you. Google Merchant Center accepts a Google Sheets file as a direct feed source, which means you can skip file generation entirely and manage your product data inside a spreadsheet.
It works for small catalogs because the maintenance overhead is low. You update a row and Google pulls the changes on its next sync. For bigger inventories, the manual work piles up fast enough to make this impractical. But for a boutique store or a focused product line, it's a helpful setup. If you're still working on growing a brand new website, keeping your feed simple like this can save a lot of time early on.
How to Structure Your Sheet
Google expects the first row of your spreadsheet to have the column headers. These headers need to line up with the attribute names Google recognizes and they are case-sensitive. The table below shows the core columns you'll have to get a basic feed working.

| Column Header | What It Contains |
|---|---|
| id | Your unique product identifier |
| title | The product name as it will appear in listings |
| description | A plain text description of the product |
| link | The full URL to the product page on your WordPress site |
| image_link | The full URL to the main product image |
| price | The product price with currency code (e.g. 29.99 USD) |
| availability | One of: in stock, out of stock, preorder |
| condition | One of: new, refurbished, used |
| brand | The product brand name |
| gtin | Barcode or global trade number if you have one |
Each product gets its own row beneath those headers. Keep the sheet clean and free of merged cells or extra formatting, because Google reads it as raw data.
Linking the Sheet in Merchant Center
Inside Merchant Center, go to Products and then Feeds and choose Google Sheets as your input method. You can connect an existing sheet from your Google Drive or let Merchant Center generate a template. Once connected, you set it as a scheduled fetch so Google checks for updates automatically.
The sync window is 24 hours, so a price or availability change you make in the sheet won't appear in Merchant Center until the next fetch runs. If you need an update to go live faster, you can trigger a manual fetch from the feed settings page; it's a helpful option to know about when you're making changes for a sale or correcting an error. When running paid campaigns alongside your feed, understanding whether Target CPA or Manual CPC works better for your goals can make a real difference in results.
Authenticating WordPress With Google's API Using OAuth 2.0
If you want a direct, live connection between WordPress and Google Merchant Center, you'll need to go through the Content API for Shopping with OAuth 2.0 - the more technical path. But it gives you full control over what gets sent and when.
The scope you'll have to request is https://www.googleapis.com/auth/content. If you don't have this exact scope, Google will reject your requests. Getting this wrong is one of the most common stumbling blocks at this stage.
Setting Up Your Google Cloud Project
Before you write a single line of code, you'll have to get your credentials in place through the Google Cloud Console. Here's the sequence to follow.

- Go to console.cloud.google.com and create a new project.
- Navigate to APIs & Services, then Library, and enable the Content API for Shopping.
- Go to Credentials and create an OAuth 2.0 Client ID. Select "Web application" as the type.
- Add your WordPress site URL as an authorized redirect URI. This needs to match exactly what your code sends back - even a trailing slash difference will break the flow.
- Download the credentials JSON file. You'll use the client ID and client secret from this file in your PHP code.
The redirect URI mismatch is where developers lose time. Google's OAuth flow sends the user back to a URI you pre-register, and if the string doesn't match character-for-character, the whole handshake fails. If you've recently changed your site's URL, make sure your registered redirect URIs are updated to match.
Making Authorized Requests
Once a user authorizes your app, Google returns an access token. You use that token in the Authorization header of your API requests to the Content API. In PHP, you'd usually use Google's own client library to manage the token exchange - it takes care of refresh tokens too, so your connection doesn't expire after an hour.
The Content API endpoint you'll call to insert or update products looks like this: https://www.googleapis.com/content/v2.1/{merchantId}/products. You pass product data as a JSON body in a POST request, and each field in that body maps to a Merchant Center product attribute. Understanding how conversion data flows into Google Ads can also help you measure the downstream impact of products you push through this API.
A wrong scope at the OAuth stage will return a 403 error that looks unrelated to permissions. Always double-check that https://www.googleapis.com/auth/content is in your scope list before moving on.
Submitting Your Feed and Fixing Common Merchant Center Errors
With your feed built and your API connection in place, the next step is to tell Merchant Center where to find your data. Inside your Merchant Center account, go to Products, then Feeds, and click the button to add a new feed. You'll get three options: a fetch URL, a scheduled fetch, or a manual upload.
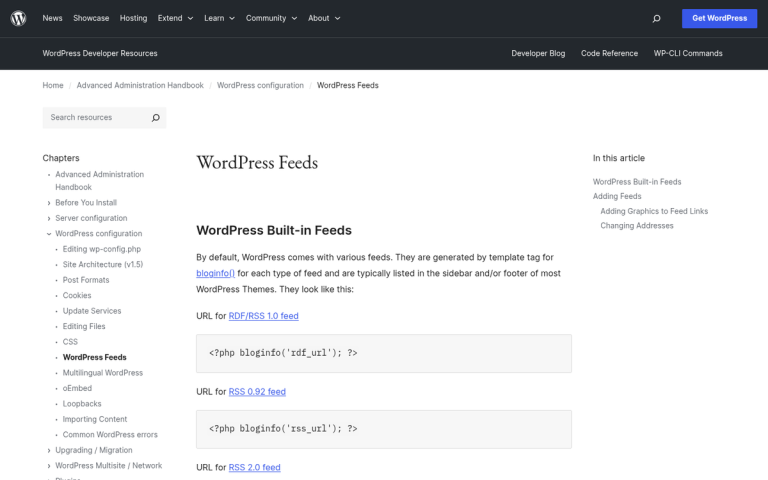
The scheduled fetch option is the most helpful for a live WordPress site. You give Google a URL that points to your feed file and set a fetch frequency - works for most stores. Google will pull from that URL automatically, so your product data stays fresh without any extra work on your end. If you're not sure how to locate your feed URL on WordPress, that's a good place to start before setting this up.
Once your feed is submitted, Google will start to review it. Check back after a few days to see your approval status.
When disapprovals show up, don't panic. Most of them fall into a handful of categories and they're fixable once you know what to look for.
| Error Type | What Causes It | How to Fix It |
|---|---|---|
| Missing or invalid GTIN | Products have a barcode but no GTIN in the feed | Add the correct GTIN to your product data in WordPress |
| Price mismatch | Feed price doesn't match the price on the landing page | Make sure your feed pulls the live price dynamically |
| Policy violation | Product description or content breaks Google's ad policies | Review Google's shopping policies and update the product copy |
| Image disapproval | Image is too small, has a watermark, or uses a placeholder | Upload a clean image that meets Google's minimum size requirements |
Price mismatches are one of the more frustrating errors because they can happen even when your feed looks correct. If your site uses sale pricing or tax-inclusive display, your feed needs to match what appears on the product page at the time Google checks it. Understanding which landing page layouts perform best can also help ensure your product pages meet Google's expectations during review.
Image disapprovals are worth checking first because they're usually the easiest to resolve. Google wants a clean product photo on a white or light background, with no overlaid text and a minimum size of 100 x 100 pixels for most categories.
Work through each error type in the Diagnostics tab inside Merchant Center - it organizes disapprovals by type and links directly to the affected products, which makes it much faster to address them one category at a time. If you run into broader site errors during this process, knowing how to diagnose and fix an internal server error can save you a lot of troubleshooting time.
You Don't Need a Plugin to Get Your Products in Front of Shoppers
Choosing the best strategy can depend on catalog size. Google Sheets works for smaller stores where product data changes infrequently and manual updates are manageable. The Content API is the better fit for bigger catalogs that need automated, real-time syncing at scale. In either case, the feed itself is what determines if your products show up accurately - so treat it as something worth revisiting whenever prices, availability, or descriptions change.
Not every store needs another plugin adding load time, compatibility risks, and update dependencies to the stack. If you have access to your feed URL, a verified site, and a Google account with Merchant Center set up, you have everything to get your products in front of shoppers - no extra software needed. If you're also running paid campaigns, it's worth understanding why Google Ads may exceed your set daily budget and how a mobile site can reduce your cost per click.